


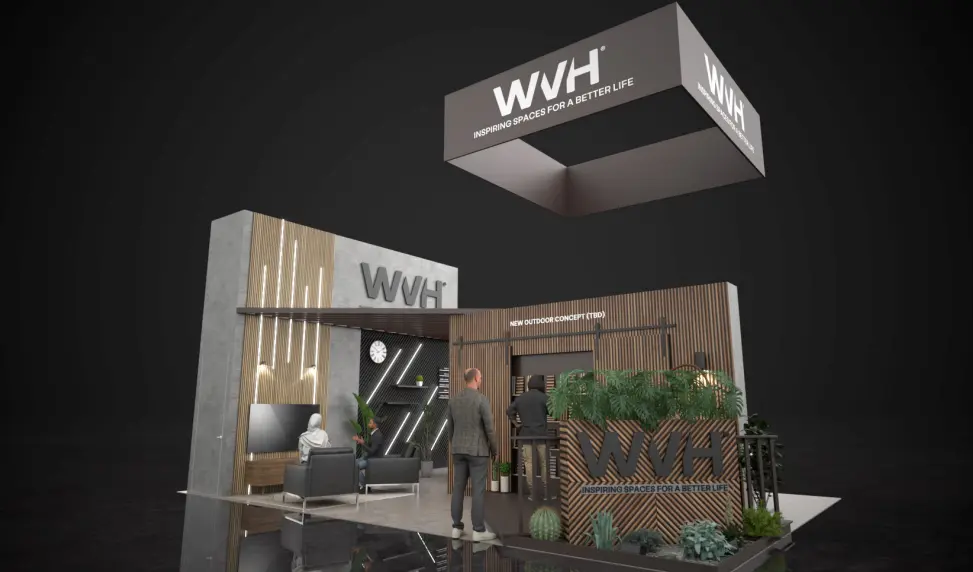
A trade show exhibit design should never get approved just because the rendering looks cool. Before signing off, exhibitors should evaluate whether the design supports their business goals, fits the actual booth space, works within the approved budget, and can be fabricated, shipped, installed, used, and reused without creating expensive surprises.
The strongest concepts balance visual impact with real-world execution. That is the standard for how to evaluate trade show exhibit design. Not whether everyone likes the colors or leadership thinks it looks impressive. A booth design has to perform.
Start With the Goal, Not the Rendering When You Evaluate Trade Show Exhibit Design
A polished 3D rendering can sell almost any idea. That does not mean the idea is right for your company.
Go back to the original goals for the exhibit. What does the booth need to accomplish?
Maybe you need to:
- Generate qualified leads
- Launch a new product
- Schedule private sales conversations
- Demonstrate equipment
- Create social media content
- Improve brand recognition
- Entertain customers or partners
The design should make those actions easier. If lead generation is the goal, visitors need an obvious reason to enter and a clear path toward your team. If product demonstrations are the priority, the demo area cannot be buried behind furniture or blocked by traffic.
Every major design feature should have a job. Anything that takes up space and budget without supporting the objective deserves another look. This is the same goal-first framework covered in how to write a trade show exhibit design brief, where the business objective is established before any visual direction is set.
Evaluate the Visitor Experience
Your team already knows the brand. Attendees do not.
Review the booth from the perspective of someone seeing it for the first time while walking through a packed exhibit hall. They may give you only a few seconds of attention.
Ask:
- Can attendees tell who we are from the aisle?
- Is our primary message readable at a distance?
- Is there an obvious entrance?
- Can people quickly understand what is happening inside?
- Are there natural places to stop, talk, watch, or interact?
- Does the layout create traffic jams or dead zones?
A good trade show exhibit design pulls people in without making them work for it. Brand identification, messaging, lighting, product placement, and staff positioning should operate as one system.
Do not approve a booth that photographs beautifully from one perfect angle but falls apart from the aisle where attendees will actually see it. The same visitor experience principles covered in trade show booth traffic flow and what makes a trade show exhibit design memorable are the practical framework for evaluating whether the design will actually perform on the floor.
Check the Design Against the Real Booth Space
Renderings can hide practical problems. Floor plans expose them.
Confirm the design matches the exact booth dimensions, orientation, neighboring exhibits, entrances, columns, height limits, fire-code requirements, and venue regulations. A hanging sign may look incredible but become useless if the venue restricts rigging or the assigned hall position gives it poor visibility.
You should also review the layout at scale. Make sure there is enough room for:
- Staff and attendee movement
- Accessible pathways
- Product demonstrations
- Storage
- Electrical connections
- AV equipment
- Meeting areas
- Hospitality service
- Personal belongings and literature
Storage is one of the first things sacrificed in a flashy concept and one of the first things missed on the show floor. If your team has nowhere to hide cases, coats, bags, cleaning supplies, and promotional materials, the clutter will become part of the design.
That is not the kind of brand exposure you paid for.
Demand a Real Cost Breakdown
Design approval and budget approval should happen together.
Ask your exhibit partner to explain what is included in the estimate and which costs are still unknown. The booth structure may fit the budget while shipping, drayage, rigging, electrical service, flooring, AV, installation labor, and storage push the total far beyond it.
Evaluate the full program cost, not just the fabrication number.
Pay attention to features that can create disproportionate expenses. Oversized components may require dedicated transportation. Heavy materials may increase drayage. Complex overhead elements may require additional rigging. Specialty finishes can add labor and make repairs more difficult.
This does not mean you should strip every ambitious idea out of the booth. It means you should know what each idea costs and why it earns its place.
A strong exhibit partner should be able to show you where to invest, where to simplify, and how each choice affects the final number. The full breakdown of where trade show program costs actually come from is covered in what drives custom trade show booth cost, where freight, drayage, show services, and storage consistently catch teams off guard when they are not scoped early.
Make Sure the Booth Can Actually Be Built
A rendering is a promise. Fabrication is the proof.
Before approving a trade show exhibit design, ask whether the people reviewing the concept understand engineering, materials, fabrication, logistics, and installation. A disconnected design process can produce concepts that are difficult, risky, or brutally expensive to execute.
Request clear information about:
- Proposed materials and finishes
- Structural support
- Lighting integration
- Graphic production
- AV placement and ventilation
- Assembly methods
- Replacement parts
- Shipping requirements
- On-site installation
Push for specifics. “Wood finish” is not enough. Is it laminate, veneer, printed material, painted MDF, or actual wood? Those choices affect appearance, durability, weight, cost, and repairability.
This is also where fabricator selection matters. The partner responsible for building the booth should be involved early enough to flag problems before they become change orders. The questions covered in 10 questions to ask before hiring a custom trade show booth fabricator are directly applicable here, where engineering transparency before approval is one of the clearest signs of a fabricator who can actually deliver.
Review the Design for Reuse and Flexibility
Your booth should not become useless after one show unless the project was intentionally built as a one-time activation.
Ask how the design can adapt to different booth sizes, floor plans, campaigns, and product launches. Can a 20-by-20 configuration become a 10-by-20? Can graphics be replaced without rebuilding entire walls? Can branded elements travel independently to smaller events?
Modularity may increase the initial investment, but it can reduce future design, fabrication, and rental costs. The tradeoff is that highly modular systems sometimes limit custom forms or finishes.
There is no universally correct answer. The right choice depends on your show schedule, storage strategy, brand standards, and expected lifespan of the exhibit.
Approve the tradeoffs intentionally. Do not discover them six months later. The full framework for planning a booth around reuse from the start is covered in how to build a custom trade show booth that works across multiple shows, where modularity, storage, and graphic refresh planning are built into the design rather than retrofitted after the first event.
Set a Deadline for Design Changes
Late revisions cost money.
Your exhibit partner should provide a timeline that identifies design approval, engineering, material ordering, graphic production, fabrication, quality control, shipping, and installation milestones. The schedule should also explain what happens when approvals are delayed.
Small changes can create a chain reaction. Moving a monitor may affect electrical routing, wall construction, graphics, engineering, and installation. Changing a finish may require new samples or materials with longer lead times.
Build time for internal review into the schedule, especially when several departments or executives must approve the concept. Collect feedback in one place and resolve conflicting requests before sending revisions to the design team.
Endless rounds of scattered feedback do not improve the booth. They burn time and budget. The Experiential Designers and Producers Association recommends that all design changes be locked before engineering begins, noting that revisions made after material ordering can increase project costs by twenty to thirty percent depending on the scope of the change.
Use a Final Approval Checklist to Evaluate Trade Show Exhibit Design
Before approving the design, confirm that:
- The concept supports a defined business goal
- Branding and messaging are visible from the aisle
- Traffic flow works for attendees and staff
- Products, demonstrations, and meeting areas have enough space
- Storage and accessibility have been addressed
- Materials and finishes are clearly specified
- The complete estimated cost has been reviewed
- Fabrication and installation risks have been identified
- The booth can be reused or adapted as planned
- Stakeholders understand the approval and production timeline
If any of those answers are fuzzy, the design is not ready.
Approve a Booth That Works as Hard as Your Team
The best trade show exhibit design is not simply the boldest concept in the presentation. It is the one that gets attention, supports your team, survives the realities of the show floor, and delivers value without blowing up the budget. Pressure-test the design before approving it. Ask uncomfortable questions. Make the concept prove itself. If you want a fabrication partner who helps you evaluate the design before it becomes expensive to change, explore Highway 85’s trade show capabilities or connect with our team to start the conversation.
Already have a booth design but are not sure whether it is ready for the show floor? Get a second set of experienced eyes on it with Highway 85 Productions’ Free Booth Audit. We will help you spot weak points, hidden risks, and opportunities to make the exhibit work harder before those problems get expensive.